Success!

After an entire semester of work, we finally got the RC car to navigate 100% autonomously! As soon as we got it working we took it to the hallways to run some tests. We gathered some trash cans and laid them in the hallway as obstacles. The car successfully navigated around them and could even go around corners and through doorways. Right now, the biggest flaw of the car is that it has trouble recognizing that a window should be considered a wall since the LiDAR’s laser just goes right through it. This is not a major concern for us right now because in any other scenario, the car works just fine. This is something we will look into next semester. Over the next few days we will be working out any small bugs that may exist in the code to get the project ready for demonstration on Wednesday.

Images of a trial run of the cars autonomous navigation can be found on the Progress page.

Recent Developments

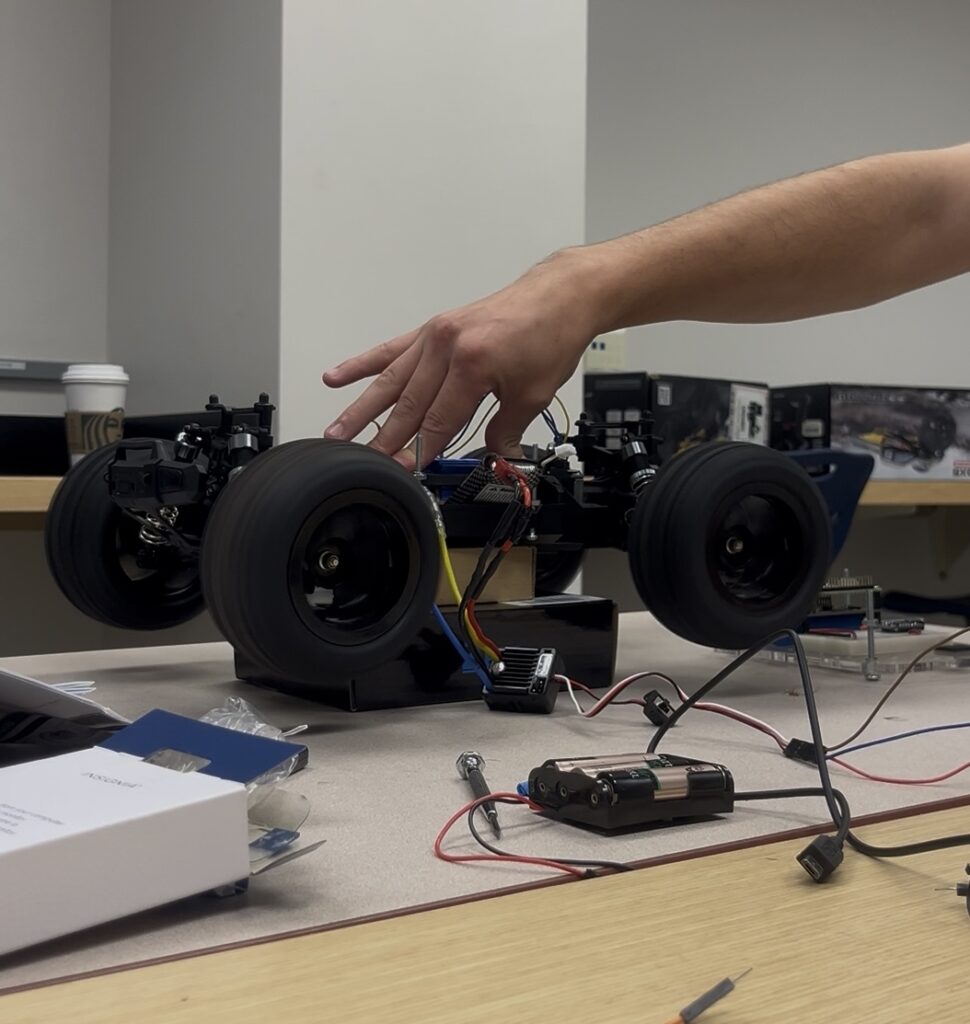
For the past week, we have been working on getting the Arduino to respond to motor commands sent from the Raspberry Pi. Since we do not have SLAM (Simultaneous Localization and Mapping) and Nav2 implemented yet, we have had to create and send the commands manually. Our initial tests of these commands to simply move the wheels of the car worked pretty well. However, we ran into some issues when trying to implement the wheel encoder data along with these motor commands.

The first issue we came across was that the Raspberry Pi’s GPIO (General Purpose Input Output) pins were unable to keep up with the stream of data coming from the wheel encoder. Large quantities of data were being left out. We solved this by instead connecting the encoder to the Arduino’s GPIO pins because they’re able to achieve faster and more predictable real-time performance due to the lack of an operating system slowing down other processes. While this did solve the problem of the loss of data from the encoder, it also caused other issues to arise.

The next issue we ran into was the drive and steering motors seeming to have a mind of their own. When testing the manual commands after wiring the encoder to the Arduino, the motors began to completely ignore any and all commands that were sent and would instead go full throttle while turning left and right uncontrollably. The reason behind this was because after we wired the encoder to the Arduino, we had too much current being pulled through the serial cable from the Pi. To solve this problem, we wired the power to the steering motor to come from the motor controller rather than the Arduino.

We have since gotten control of the car and are now trying to test the conversion between velocity commands (mm/s) from the Pi and the PWM (pulse-width modulation) values on the Arduino that actually signal the motors to drive.

Another, slightly less notable development is that we redesigned the electronics housing per the advice from our technical advisor, Dr. Adegbege. He brought up the possibility of the inside of the housing getting to hot from all the electronics running. We reprinted the housing with openings in the top to hopefully vent out any hot air that accumulates.

The new design can be found on the Progress page.

Arduino Implementation

As our project progressed, we realized that having a separate microcontroller for the motor control would be a good idea so that the Raspberry Pi can focus solely on the “thinking” side of the robot. We have decided to use an Arduino Uno R3 for this task. The Arduino doesn’t handle any mapping or decision-making, that all happens on the Raspberry Pi. Instead, the Arduino’s job is to take the movement commands coming from the Pi and turn them into real physical actions on the car. Together, the two boards work like a brain and a body: the Pi figures out what the robot should do, and the Arduino makes it actually happen.

A more technical description of the Arduino can be found on the Design Choices page.

Making Progress

In the past week we have made significant progress in the development of our racecar. First, we finally got Gazebo working and were able to simulate a robot similar to our racecar in an environment and used it’s simulated sensors to navigate the robot to a selected point. This was a major stride towards the eventual path planning and obstacle avoidance of our actual racecar.

We also wanted to make a housing for all our hardware so that there were as few wires and equipment showing as possible. The design of this housing was done in Onshape and then printed on an Elegoo Neptune 4 Pro 3D printer. The print itself took about 7.5 hours and 300 grams of filament but luckily it only took two tries to get everything to fit together nicely.

Images of the Gazebo simulation and housing design can be found on the Progress page

Connecting the Raspberry Pi to Wi-Fi

Today, we spent about two and a half hours working with the Raspberry Pi in an effort to get it communicating with the laptop via Wi-Fi. Our plan was to connect them both to the schools network since we wouldn’t have to worry about the two being too far apart. Something about the schools network was not allowing them to communicate and we could not find a way around that so, instead we settled for the personal hotspot on Cole’s iPhone. Unfortunately this means that someone will have to follow behind the RC car with the laptop once we actually get it to navigate the halls of the engineering building. While this isn’t the most ideal solution, it’s better than nothing.

Recent Roadblocks

For the past few weeks, we have had issues bridging the Raspberry Pi with a desktop computer because to do so, they must be connected to the same network. However, the Raspberry Pi is currently connected via Ethernet, which results in a different IP address compared to Wi-Fi. Our temporary solution is to connect the desktop to the Ethernet so that they share the same IP address. This is not a long-term solution because the Raspberry Pi will eventually need to be wireless.

Another roadblock we have come across is the lack of our own desktop computer in our workspace. We often have to share a computer with the project group next to us, which can be an inconvenience at times. We also require a monitor to view the software downloaded on the Raspberry Pi, which we do not have. We are currently working with the engineering department to get us the equipment we need.

Initial Drive and Steering Test

Today we implemented an Arduino Uno R3 into our racecar to test the motors response to basic drive commands. Our goal was to find out what a safe speed would be for the car to operate. Since we did not want the car to drive itself off the table, we elevated it by the base so that the wheels could spin freely. What we failed to consider was the lack of weight on the wheels, which caused the them to spin way too fast, nearly shaking the car apart. Lesson learned.